In June 2010, I produced my first large run with a co-packer. It went smoothly until I determined the net weight on my labels was not the actual net weight of what was in the jar.
Fail.
That’s what inspired me to write today’s post — all about food labeling requirements. What goes on your food label is one of the most complex tasks to complete when you’re starting your food business. There are legal requirements, font size requirements, weights, and more.
Just grab the Excedrin bottle. Seriously.
That’s why it’s all sorted out for you right here, right now. Let’s get started:
There are three parts to your label:
- Principal display panel – the part that faces the customer when your product is on the shelf
- Right display panel – to the right of your principal display panel
- Left display panel– to the left of your principal display panel
After defining what information to publish on part of the label, I’ll share how to get the labels printed too.
- How to make your first label
- How to get labels professionally printed.
- Label decisions you’ll need to make.
- Conclusion
Let’s start with the principal display panel.
What goes on your principal display panel?
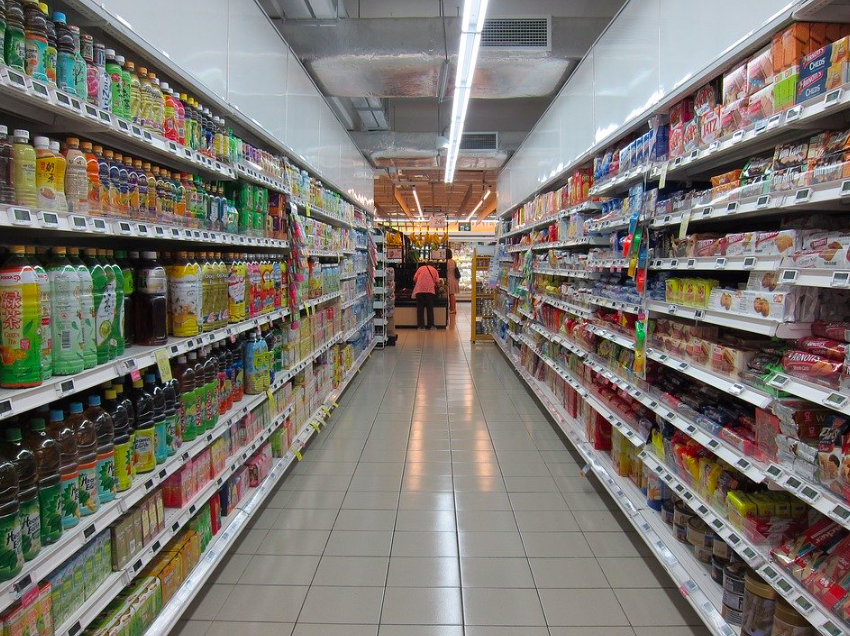
Want your food in retail? You’ll need labels.
Company name & logo: this can be any size and color, but it needs to be identifiable because consumers have to find it on the shelf. When I was first starting out, our logo was huge — half the height of the jar. Then, when we redesigned our labels, it got much smaller. That’s because we wanted our product names (which are remembered by our customers) to steal the show. It’s different for every company, so make sure your brand is recognizable.
Product name: Does your product have a fun name like my mustards? Or do you simply want to say Horseradish, Peach Ginger, or Hot & Spicy? Describe your product, then identify it (see below).
Product identification: What do you sell? Even though you think it’s obvious, you’ve to got to explain what it is? Is it cookies, brownies, mustard, salad dressing, bbq sauce, etc. Don’t leave the contents of your bottle up to your consumer to figure out.
Product claims: Vegan, gluten free, non-gmo, organic, etc. What claims is your product making? Do you have documentation to prove your claims? Do not lie. Customers trust you when they purchase their product. If you lose their trust, you lose business.
These can also go on the sides of your packaging, but consumers don’t typically rotate the product. That means you’ve got to shout it from the rooftops on the front of your label.
Related Reading: The Hidden Costs of Working with a Co-Packer Revealed.
Net weight: Just because you have an 8-ounce jar doesn’t mean 8 ounces of product goes in it. For example, water is not the same weight as concrete. Get your net weight right so that you can weigh your filled product to make sure there’s enough sauce in the jar. Yes, you can be over by a couple grams, but don’t be under.
That’s illegal because your deceiving the customer. You can find your net weight by filling your container and weighing it. Then, weight an empty container. Subtract the two numbers and you’ve got your net weight? Try to keep it to a nice round number, though – 9 oz, 3.5 oz. Makes the per ounce (or gram) calculations easier for retailers and customers.
What goes on your right display panel?
Nutrition facts and the ingredient statement are published on the right display panel.
Place of manufacture: Who are you and where do you make this product? Include full company name, town, state, and zip code. You can include your street address if you’d like love letters, but it’s not required. Use the kitchen space here or your “warehouse”.
Phone number: Smart to include here if people have questions. We used to put our home number but that quickly got annoying. On our next reprint, we switched to a free Google Voice phone number. It’s amazing. Just get one to have it. You can screen calls, listen & archive voicemail anywhere, and the calls can go straight to your cellphone if you’d like. Another example is Grasshopper if you have a small team and want to have that “office” feel.
UPC Code (this can also go on your left display panel): There’s been a lot of talk about using recycled barcodes. Don’t do it. Yes, it’s cheaper. But, if you want to get into large grocery stores, they require your GS1 prefix (which isn’t unique to you if you buy recycled barcodes).
Bite the bullet and register with the GS1. Up to 100 barcodes has a startup fee of $750 plus an annual renewal of $150. Get more information on how to get a barcode for your food product.
What goes on your left display panel?
Your left display panel is pretty much a blank canvas. But here are a couple things you can add to make it a bit more interesting.
How to use your product: When your product is on the shelf, the normal consumer has no idea what to do with it, or that you have these magical ways to use it. Let them know about recipe ideas, your personal favorites, and how they might actually use the whole jar or package and buy more – Yes – MORE!
Your company story: Who makes the stuff? Why’d you start your company? Are you super-tiny? Let customers experience your company in a few words. And entice them to learn more by visiting your website. And pictures of the founders – or signatures – are a great personal touch.
You Might Like This: 25-Step Plan to Making Your Food Company a Reality
Product claims: If you’d like to expand on your product claims or mention how you source ingredients, let your customers know. They’ll appreciate your honesty. Remember, lying doesn’t get you anywhere in the food business.
Social media: Are you on facebook, twitter, instagram, and pinterest? Put logos on your packaging or list your social media addresses. I personally just do the icons. And only put accounts you’re most active on. That way, when customers view your dead twitter account they aren’t turned off when the last update is from three years ago.
And your profile picture is still an egg. And QR codes? Don’t do it. They’re ugly. And people aren’t going to whip out their smartphone to scan your code that goes to your website. That’s not useful to them.
Now, that you’ve got all the information, you may be wondering how this all comes together into something that doesn’t look like you made it in Microsoft paint? (PSA: don’t make your label in paint, MS word, or the like).
How to make your first label:
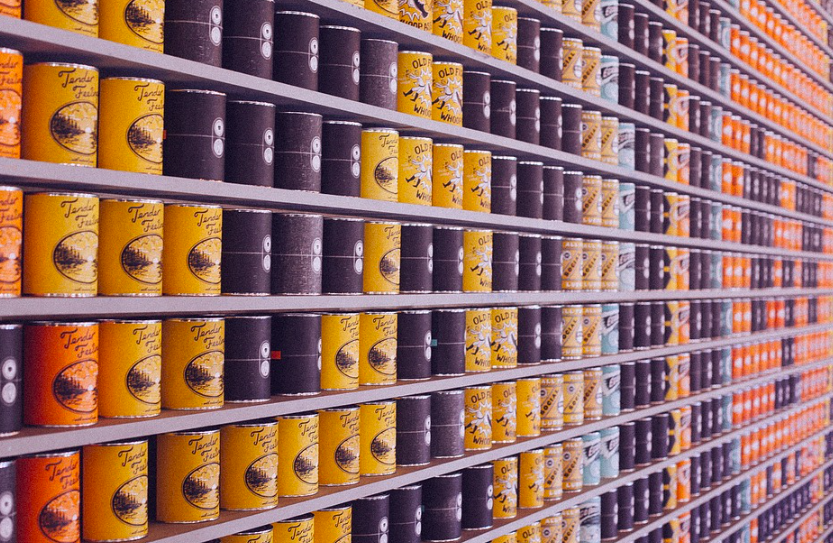
Labels are an essential part of your packaging and design.
When I was starting out (technically way back in 2007 at a farmer’s market) I used ball jars from Wal-Mart and two address labels. The front label had my logo (Green Mountain Mustard). The back label had ingredients, town, and phone number. Illegal? You betcha. There was no net weight. Didn’t even know I needed one. It worked for the time being.
If you’re just starting out, printing labels off of your computer is perfectly fine.
I did for the first two years. I designed something in Adobe Photoshop. If you don’t have photoshop, use Microsoft Word. Even though I despise doing anything in Microsoft word now, it’s actually quite easy:
1. Find the label you want. There are thousands of sizes, colors, textures, waterproof, etc. The best play to buy labels online is OnlineLabels.com — way cheaper than Staples or Office Depot.
2. Download the corresponding template. Most labels correspond to an Avery design template. You can download label templates here. They come in either PDF or Microsoft Word formats. Open the file and get to work.
3. Design your label. There are a couple ways to do this. You can design your label in Microsoft Word using the text tools, colors, and clip art (not recommended) or you can import your logo and use the same text to format ingredients and all the other label requirements.
Keep the same color scheme across your product line so it looks put together – even though you’re printing them on your home computer. Speaking of printing….
4. Print your labels. Simply go to file > print and fire away. It sounds simple, but printing is actually a bit more complex. First thing to determine is what kind of printer you have. Any inkjet printer will print labels at lower quality. They’ll also run and smudge if they get wet (That’s happened to me before, and it’s ugly).
So much for giving your product as a gift, huh? The other kind of printer is a color laser printer. This prints higher quality – and higher resolution – labels. You can pick one up for a couple hundred bucks. It’s a great investment if you’re just getting started.
Now that I’ve covered printing your own labels, you may be thinking, ok – get to the good stuff. How do I go about getting legit labels? Like grocery-store-worthy labels? Here we go.
How to get your labels professionally printed:
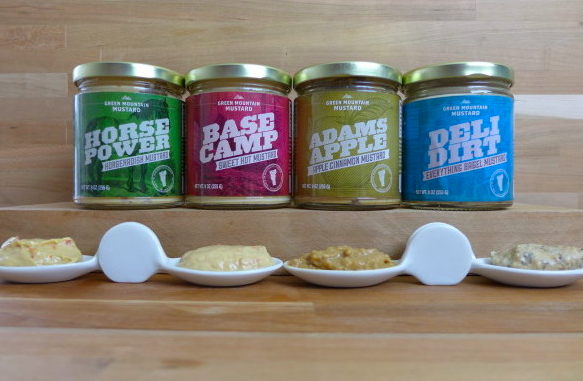
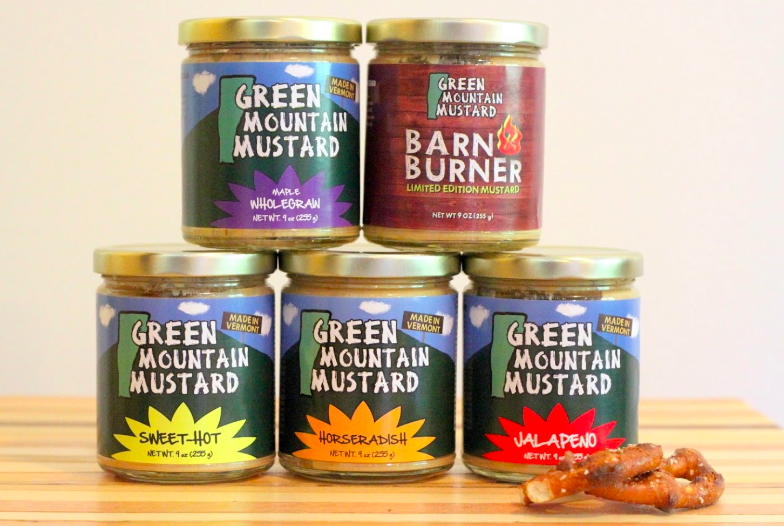
The labels / branding of my own mustard line.
So your selling enough product that your labels could be professionally printed? For me, that mark was comfortably being able to use at least 1,000 labels a month. Then, I could order in bulk to get my cost own with the printer. Why wait? Well, getting your labels printed can be expensive.
Even if you go with an online vendor with “great prices” it can be expensive. So, let’s start with finding a label printer.
How to find a label printing company
1. Look locally
Simply search for “label printing company” and there’s bound to be a couple within 50-100 miles. Call them up, go see their facility, and meet the sales and production teams. Shaking the hand of the production manager at the company we use was definitely reassuring. (Ok, I’m a sucker for working with local companies).
2. Search for online providers
There are tons of online providers of label printing. Most work on high margins and charge accordingly. Price it out, shop around, and find the best price. Ask for a sample kit of different sizes, shapes, and materials. That way, you’ll be better educated when you talk to them on the phone about what you’re looking to do. Pro tip: don’t place the order blind. Pick up the phone. Save money – and your next headache.
3. Ask around
I found my current printer through personal relationships (see below), but my first print contact came from another food producers. I loved their labels and asked where they got them printed.
Just like searching for an ingredient supplier or a finding a co-packer, there are certain questions you should ask to find the perfect label partner for your food business:
What kind of printer do you have?
This is important because it determines your printer’s capabilities. Do they print digitally? Flexographically? Boxes, labels, bags, etc? Some printers print more labels per hour which reduces your cost, but the printer’s overhead. That may ultimately mean a higher price, but only calling will find the answer for you.
What’s your minimum run for labels?
How many labels do you need? I usually print 20-40k labels at a time. With that being said, I’ve also had to trash labels multiple times because of spelling errors, name-changes, or rebranding my food business. Most label printers have label minimums as low as 100. But you’ll pay a pretty penny. Once you get into several thousand labels, you’ll see a nice price break. Then, the difference between say, 60,000 and 80,000 labels is negligible.
How much are start-up costs for brand-new label designs?
There may be art design fees, printing plate costs (only if you’re printing flexographically) and setup fees. Plus shipping and other miscellaneous fees. Make sure these are calculated into your per unit labels cost and ultimately your food product cost.
What’s your lead time for an order?
Don’t run out of labels. I’ve done it several times and it’s not exciting. Especially if you use a co-packer. Then, you end up labeling yourself and it takes hours because you don’t have access to a machine (we still don’t :p). Plan ahead – a couple weeks – for ordering more labels. That way, you’ll have plenty for your next production.
Who else do you print labels for?
Testimonials are the best form of marketing for any label printer (like the one below I wrote for Creative Labels of Vermont). Ask who else they print labels for, send them an email and ask about their experience, possible pricing, and if they have had any problems. If not, get a quote and start your own relationship. Plus, the list of their clients is a major source of credibility.
Download Now: Recipe Cost Calculator – Free Spreadsheet and Tool
Will you help me through the label purchase process?
I got mote into customer relationship below, but if you’re a first-timer, label printing is straight-up daunting. You want to work with account managers who walk you through each step – from design to final printing. Because you don’t need to worry about it anymore. Your label printer does. Make sure you’ve got a great team to work with.
These questions, while obvious, are the ones you’ve got to ask. Many times, label printers are the “you get what you pay for” type. The best price doesn’t always mean the best quality. And quality is important. Your label is your first interaction you have with your customer on a store shelf. It shouldn’t look like crap, right? Right.
What you need to decide about your labels:
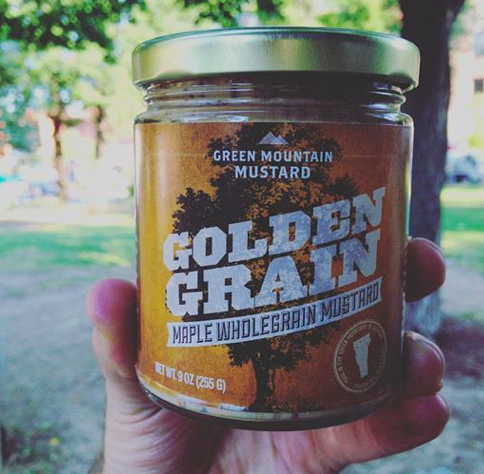
My top selling whole grain mustard.
1. Size / How many
How big do you want your labels? Should they cover the whole container? Do you want a top and bottom label? A top label and a wrap-around label. Keep in mind, the more labels you use, the higher your costs become.
2. Shape
Rectangular? Rounded corners? Or how about a die-cut? A die-cut is a special shape that you pay extra for up-front. It could be an outline around a character, bubble shape, or hole in your label to show your product inside its container. Die-cuts make your product stand-out on the shelf and create a powerful brand message.
3. Number of Colors
A black and white label is the least expensive. As you start adding colors – or printing full color – the cost goes up. Think about this when designing your labels. One way to save money on label printing is to keep your design the same and only change certain characteristics. That way you avoid multiple plate charges and switch-overs (the time it takes from switch to printing another design).
4. Material
It’s mind-blowing to learn how many kinds of labels there are. There are solid color, white, textured (like wine labels), clear, thick, thin, UV coated (doesn’t deteriorate in light), matte, gloss, foil-printed. Craziness.
Let your account manager know about what you’re putting the label on – the material, the temperature you fill your product, and what you’d like it to look like when it (maybe) goes in the fridge – no runny labels! This is where a sample pack is helpful. It allows you to see your printer’s capabilities and select the best material for your project.
5. Quantity
Quantity plays a big role in price. Every penny counts when you’re talking about product cost. That means if you can order thousands of labels, do it. Your price drops significantly – to the tune of 7 to 10 cents or more. I have ordered for the entire year at once and it’s been a good strategy. If you think you’re going to make changes to your labels, order less so you’re not stuck with old labels. They’ll just be piles of money in your basement.
A note about relationship building and customer service:
Even after all the questions get asked and the order gets processed, you want a relationship with your printer. They are a crucial partner to your success. Know who to talk to, chat with them at events. Why? They know everyone who is everyone is the local food scene. And I mean everyone. They’re connected like good wifi. For real. Relationship is the reason I switched printers.
Why I switched printers:
My original labels. I had these redesigned and updated eventually.
In 2010, I started with a company out of New York. I switched to them because of price. And we all know price isn’t the only reason we buy from people. But, they were inexpensive. Until the quality dropped and they were unable to print my newly labeled designs (you know the ones I almost lost $2,000 printing?).
I was in a time crunch. The labels needed to be printed, like, yesterday.
That’s when I remembered (ages ago) speaking with Zara from Creative Labels of Vermont (our current printer). She had been trying to win my business ever since the first jar of Green Mountain Mustard hit the shelf. And she won it in minutes after I contacted her in a bind.
“I need these labels rushed. My current printer says it’s impossible to print but I don’t believe him. Get it done by Friday and you’ve got my business.”
Within minutes, she not only said it was definitely possible, but she came back with a price I couldn’t turn down. The artwork was sent over and our labels were ready to print. At 6:30pm the night before printing, I forgot “refrigerate after opening”. After basically suffering a mini heart attack, it was fixed at no additional cost. Seriously.
Not only that, I was able to see the press proof the morning of – an actual label in my hands – for free. They’re 10 minutes away from my kitchen, so I save on shipping costs, too — but bottom line: Zara at Creative Labels of Vermont has done an amazing job of making me feel comfortable through the entire process, connecting me with tons of other start-up food producers, and investing in our relationship – regardless of how super-tiny my orders are.
Conclusion
Labels are time consuming to figure out. That’s why, when you reach the point where you need to get labels printed, you should invest time into finding the right printer for your needs – even if it means making the switch to other provider.
I urge you to find a label printer with an eye on relationship building who has the same passion for making your product beautiful on the shelf. It’s vital to the success of your business.
Have more questions about food labeling requirements and finding a label printer? Join our food business community to get support, exclusive interviews, and our food business startup kit.
**Disclaimer: Please use this advice as guidance to creating and printing your food labels. Consult your Agency on Agriculture & Markets to get your labels approved by your state authority before printing.


