Mushroom farming, also known as fungi culture, is one of the fast-growing agricultural businesses out there. Believe or not, the cultivation of mushrooms and other fungi is nearly the same as cultivating crops like corn, fruit, rice, and vegetables.
As of 2019, China is the leading country that produces mushrooms, accounting for 75% of the world’s total production. This is followed by Japan with 470,000 tons of produce and the US with more than 380,000 tons. In the US, Pennsylvania leads with 65% of the nations mushrooms are grown. In general, mushroom farming in the US is reported to contribute an estimated total of $46 billion in 2020.
Through the years, mushroom farming has grown in popularity all thanks to mushrooms producing a high yield in small spaces and how relatively easier it is to grow them even for beginner growers. If you’re interested in starting your own mushroom farm, this article will give you a rundown on everything you need to know from the cost to start a mushroom farm, to how much land you need, types of mushrooms to grow, equipment list, cultivation methods. I even reveal some pro tips explaining how to can enjoy your harvest.
How Much Does it Cost to Start a Mushroom Farm?
You could grow mushrooms.
The cost to start a mushroom farm depends on a lot of factors but it would roughly be between $3,000 to $100,000. One of the major factors in acquiring the right space, both indoor and outdoor areas. You’ll need a building with concrete floors for ventilation and temperature control and outdoor space with concrete flooring too. To give you an idea, a 500-square-foot space would allow you to produce 12,000 pounds of mushrooms every year.
Now let’s take a more in-depth look at the costs of equipment. Obviously, you can’t run your mushroom farm without having the proper equipment and these are usually very costly. If you’re opening a commercial mushroom farm, you would need a humidifier, laminar flow hood, and sterilization equipment.
A fruiting chamber is an indoor place where you can grow your mushrooms. Constructing one can be as simple or as complex, as you want it to be but a 12 square meter room can produce about 30kgs a week. You’ll then need indoor hydroponics grow tent that can cost around $350. A humidifier for about $100-$300, but high-end models can go beyond $1,000. Alternatively, you can get a hydro fogger that does the same thing as a humidifier which costs about $350.
You would also need lights in the room. Experts suggest getting 150 watts of LED lights and a meanwell driver for about $120. An exhaust fan will help you with ventilation and that would set you back around $90. Next is shelving, you can DIY or simply buy ready-made shelving for $65.
Mushroom Lab
The next thing you’re going to need is your mushroom lab with a very basic setup. It is highly recommended to have a room with concrete or vinyl floors. Once you have a room, purchase a laminar flow hood that has HEPA filters to take out contaminated air and prevent molds and bacteria. The whole laminar flow hood set up with HEPA filters costs around $520, not including the blower and control unit for about $400. You’ll also need to purchase a good autoclave for $800 and an impulse sealer worth $230. Lastly, it would be more hassle-free to get a stainless steel bench that’s easy to clean. You can buy one online for $140.
There are other small things you’ll need such as blow torch, scalpels, scissors, Petri dishes, masks, gloves, etc. that could all add up to around a few more dollars.
Incubation Room
Your incubation room doesn’t need to be pretty, but it should at least be clean and organized. This is where you keep your mushroom blocks and keep the temperature for a specific amount of time. So, you will need to buy an air conditioner for about $300, an electric fan for $60, and an ink bird controller to keep the correct temperature in your incubation room.
Related Reading: How-to Start a Part-time Crawfish Farm
Once all is set up for pre-incubation, now let’s get to the part where you’ll make your mushroom bags ready. If you have the budget, you can go for the expensive ones that cost more than a couple thousand dollars, or if you want to save money, do it manually. Purchase an industrial weighing scale and an automated water meter. Get ready to spend about $160 on these.
To save on costs, you can make a homemade boiler and homemade steam tanks that will cost you around $700, as compared to buying ready-made ones for about $1,300.
Post-harvest
The most important thing to have is a commercial fridge to help your crop stay fresh longer. Although it is quite expensive to find a decent commercial fridge, it is definitely worth the investment. Some of the other things to buy are fruit containers, a stainless steel bench to cut up your harvest.
Lastly, to get your harvests ready, there are a few more things you’ll need: unicorn grow bags, hardwood fuel pellets, and a supplement called soy hulls.
How Much Land Will You Need?
You can start with a small area and move to a bigger one once your business is stable. Other people have managed to get started with their mushroom farm right in their backyard. All you need is to have all the right equipment to get you started.
To give you an idea of how much mushrooms can be produced in a given space, square feet of land can produce about 7lbs to 25lbs of mushrooms every year. One square meter of land produces 35kgs to 125kgs of mushrooms per year. Experts advise at least three acres of land. You can either find a vacant lot or a vacant industrial building that you can easily transform.
What Sort of Mushrooms Grow Well At Home?

Mushrooms on pasta.
Deciding which type of mushrooms to grow would depend on your market. But if you want to start small to get an idea on how to manage and grow them before committing to go big with a large mushroom farm, here’s a list of mushroom types that can easily be grown even in your backyard.
Take note that although these types can grow well at home, they have specific needs you need to take care of to make sure they grow well. Now, let’s get started.
Button Mushrooms – Button mushrooms are the type of mushrooms that grow vertically. They are among the easiest to grow because they are low maintenance and survive in total darkness, meaning you can place them under your bed, in a closet or in the basement. All they would need is a high nitrogen substrate to ensure consistent moisture and growth.
Maitake Mushrooms – This type of mushroom is a favorite of foragers. They are also called the hen of the woods and typically grow at the base of oak trees. Maitake mushrooms are very versatile as they can grow quite large and give off a strong flavor. Experts suggest growing them in a wood substrate and keeping the area moist.
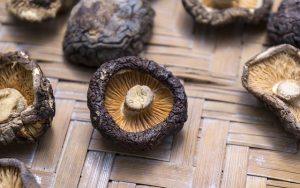
Shiitake Mushrooms – Shiitake mushrooms are the type that typically grows on decomposing logs so it’s best to place them in a woody substrate. Unlike the button mushrooms, this type takes longer to grow but its taste definitely makes up for the long waiting time. They can grow outdoors but will need to be placed in the dark until it’s time for them to start fruiting.
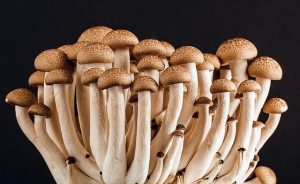
Oyster Mushrooms – Oyster mushrooms are recommended to beginners because they are typically easy to grow and would definitely survive in almost any substrate such as sawdust, cardboard, and straw. They need consistent moisture so having a spray bottle can be pretty handy. There are also a variety of oyster mushrooms and are best eaten fried or sautéed.
Wine Cap Mushrooms – Unlike most of the ones featured in this list, wine cap mushrooms grow better in sunny, outdoor areas. Growing them would be best in a straw, wood chips, or a mixture of both. They taste slightly nutty and have a unique flavor. When cooking, they can be grilled, sautéed, or fried and work well either with soups, sauces, or rice dishes.
Enoki Mushrooms – Enoki mushrooms are small size mushrooms that also grow on decomposing logs. What’s interesting about them is that they fruit during winter. Because they are small, it’s easy to overcook them but generally, enoki mushrooms work well in soups and can be eaten as a snack.
Lion’s Mane Mushrooms – Known to have a distinctly sweet flavor similar to crab and lobster taste, the lion’s mane mushrooms are often used as a great alternative for meat in seafood dishes. You can grow them on logs and grow bags but it would take them slower to do so. As a beginner grower, it might be a challenge to get the timing right when growing this type of mushroom.
Equipment
Your equipment needs will vary depending on how small or big your farm is but I’ll be listing down the most important equipment you should have to get your mushroom farm going.
Indoor hydroponics grow tent – Indoor hydroponics grow tents are collapsible tents you can place in your garage, basement, or an empty room. To protect your mushrooms from seasonal changes, growing them in indoor hydroponics grow tent will ensure that you can have them all year round.
Humidifier – To promote a successful and healthy development, your mushrooms require high levels of humidity. Having a humidifier will ensure that proper levels of humidity is present for your mushrooms although it is best to try it out a couple of times to know the relative humidity that works best for your mushrooms.
HEPA Filters – These filters are used to create a laminar flow hood. HEPA filters help create a sterile environment for growing your mushrooms to prevent contaminants such as bacteria, dust, fungi, and viruses.
Mushroom Blower – A mushroom blower is used to give proper ventilation. This is usually made of quality grade steel with improved motor and reduced airflow.
Stainless Steel Bench – Cutting your mushrooms can be messy which is why having a stainless steel bench will help you tidy up better when doing this task. It also makes cleaning the area easier than any other choice.
Mushroom Bagging Machine – Once you’re ready to pack your mushrooms, a mushroom bagging machine will help you get the job done faster and easier. Compared to doing it manually, having a mushroom bagging machine will save you time and effort.
Industrial Weighing Scale – This comes in handy to make sure you have every bag weighed properly.
Mushroom Substrate Sterilizer – For your mushroom cultivation, you can avoid low yield by killing off bacteria using a mushroom substrate sterilizer which can either be purchased or made at home.
Commercial Fridge – Make sure your mushrooms stay fresh longer by getting a decent commercial fridge.
Prepare The Growing Area
The growing area is one of the most important parts of your mushroom farm because this is where the mushrooms will grow. It is where the magic happens! Ensuring that it is in the best shape with all the things you need allows for a bigger chance of success on your mushrooms.
The size of your growing area depends on how many mushrooms you’re planning to grow. But small or big, what’s more, important is that it is equipped with everything you need especially because your growing area is a controlled environment where humidity, temperate and CO2 levels are managed.
Related Reading: 617+ Creative Ranch and Cattle Farm Business Names
It is critical to have all elements under control to make sure you’re growing your mushrooms well. Having the right equipment will help you manage your growing area better and make sure all critical elements are under control.
Select Cultivation Methods
When it comes to cultivating your mushrooms, there are various methods to choose from. Each of them comes with its own pros and cons. To know what cultivation method is best for you, I’ve explained each of them below.
On Paddy Straw – This method involves different stages of preparation including preparation of spawn, preparation of mushroom bed, spawning and watering of mushroom bed, mushroom crop production, and last but not the least, harvesting of mushrooms.
Spawn may be acquired by either the tissue culture method or by pure culture which happens by generating spores that were obtained from your desired mushroom fruit. Spawn may be grain spawn or straw spawn. You can get grain spawn by preparing grains of rye, sorghum, or wheat cooked in water and sterilized in an autoclave for half an hour, inoculating it with pure culture of mushroom, incubated at a proper temperature.
Meanwhile, straw spawn is prepared by cutting wheat straw or paddy straw in your desired pieces, soaking them in water for 5 to 10 minutes, then mixing in 2% lime. This is also usually done using glass bottles.
Want to grow these?
Prepare the mushroom bed by getting a bamboo or wooden frame cut in your desired size. Prepare paddy straw bundles by removing the leafy material from an uncrumpled paddy straw that’s not more than a year old. Remember to tie both ends of the bundle of straw that weighs about 1kg.
Remove the spawn from the water bottles and crush them into small pieces using your fingers. Spawning should be done on the first layer of straw bundles. After this, make sure to the gram or pigeon pea powder should be dusted all over the spawned area.
Related Reading: 150 No-Nonsense Cattle Feed Brand Name Ideas that Resonate with Ranchers
You should water the mushroom bed lightly to avoid drying out the bed surfaces. Do this once or twice daily to maintain the temperature between 35° and 40 °G. You can expect small mushroom buttons 10 to 15 days after you start spawning. However, getting a crop of mushrooms usually takes 4 to 6 weeks. Lastly, you should pick up the mushrooms by lightly twisting them so the neighboring ones are not disturbed.
On Wood Log – Purchase and cut out logs that are 60cm long and about 2.5cm to 3.75cm thick. Dry them under the sun for 15 days and then soak in water for 7 days. Cut out a 2cm hole on the logs at 7.5cm away from each other. You then have to fill the holes with the wheat grain spawn of Pleurotus sajor-caju.
Incubate the logs in a room with a temperature between 20°G to 30°G by keeping them vertically arranged and covered with a polythene bag. Don’t forget to water the logs every 5 days and remove the polythene bags as soon as you see mushroom buds appear. Normally, you can see two flushes of mushroom fruit bodies after 80 to 90 days.
Enjoy Your Harvest
Harvesting your mushrooms is the most rewarding part of having a mushroom farm. This is the time when you will literally see the fruits of your labor. Keep in mind though that proper harvest and storage of your mushrooms is important before delivering them to your customers.
Cleanliness is a top priority. Wear proper clothes and gloves, use clean tools and equipment when harvesting your mushrooms. Make sure that the knife you’re going to use is often cleaned as it is easy for bacteria to grow and spread. You might also want to consider wearing a mask as it is common for mushroom growers to develop an allergy to the spores of the mushrooms.
So, there you have it, a complete guide on starting your own mushroom farm right in your backyard.


