Editorial Note: The author of this post Malcolm Bedell is not a professional food blogger. He runs a restaurant and food truck full-time in Rockland, Maine, and doesn’t spend the majority of his time editing photos. You can learn more about his restaurant here.
I’m shocked (shocked!) to see how many amazing chefs there are out there, masters of their craft, who give as much attention to a single artful drizzle of pomegranate coulis as I give to an entire dish, but who can’t seem to take a decent food photo to save their lives.
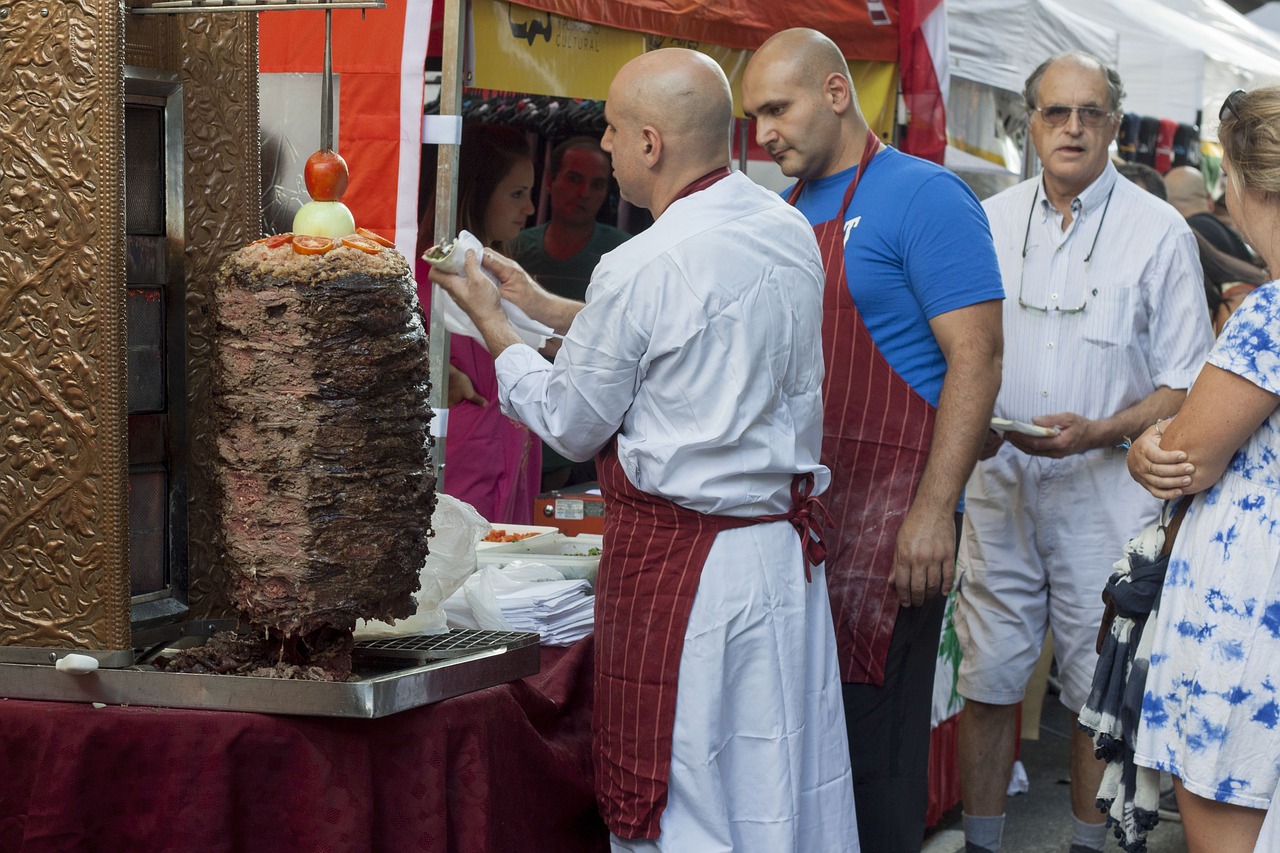
In the social media era, many cooks are responsible for so much more than putting amazing food on the plate; they’ve got to handle their own public relations work, advertising, and social media.
Here’s the problem: Food photography is really, really hard. In fact, even seasoned photographers can struggle with food as a subject matter.
Stop Taking Bad Food Photos
There’s so much that can go wrong: Food can look bland and unappealing, or sloppy and wet. Harsh lighting, dark shadows, and weird camera angles can all conspire against you. Even the most beautifully seasoned and charred steak can look anemic and sad, when photographed under the wrong conditions.
We believe that one of the quickest ways to increase the social media following for your restaurant, is by improving the overall quality of your photography. In this post, we wanted to take a look at a few basic concepts that will allow ANYONE to take better food photos, without investing a small fortune in equipment or burning hours of your life studying advanced photography concepts.
Whether you’re using the point and shoot you got for Christmas in 2004, the latest model iPhone, or a more advanced DSLR camera, each of these concepts will help you to think more about your subject, and take more appealing photos.
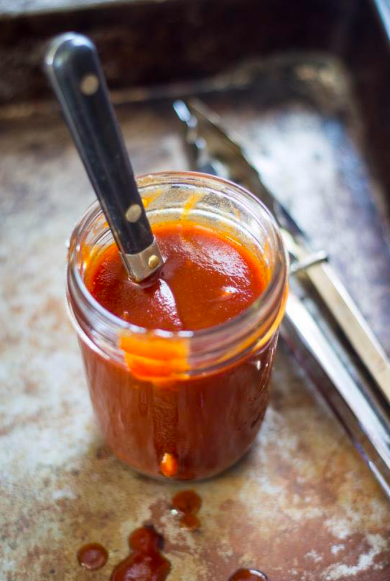
But first, a little background, and a few caveats. I am not a professional photographer. I’m not even a particularly capable amateur. But my food photos have steadily improved over the years. Take a look:
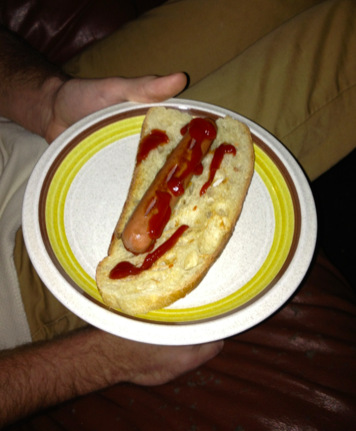
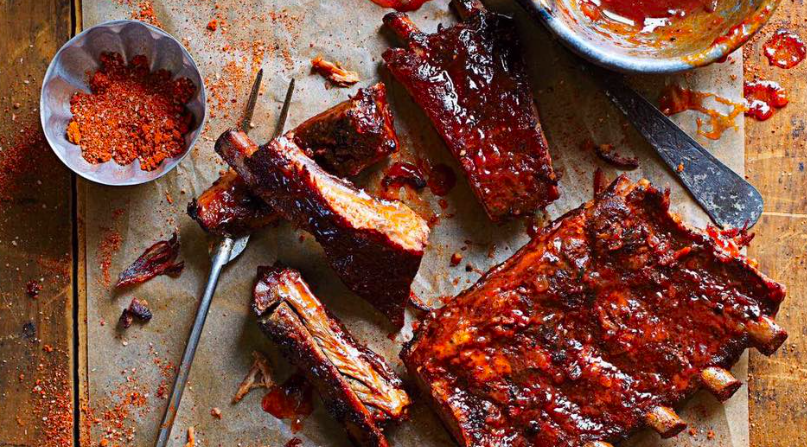
Here’s one of the first photos I ever took of food. It’s an embarrassing mess. While I couldn’t do anything about the lighting in the restaurant, that’s only the start of the problems with this photo, which we’ll talk more about later.
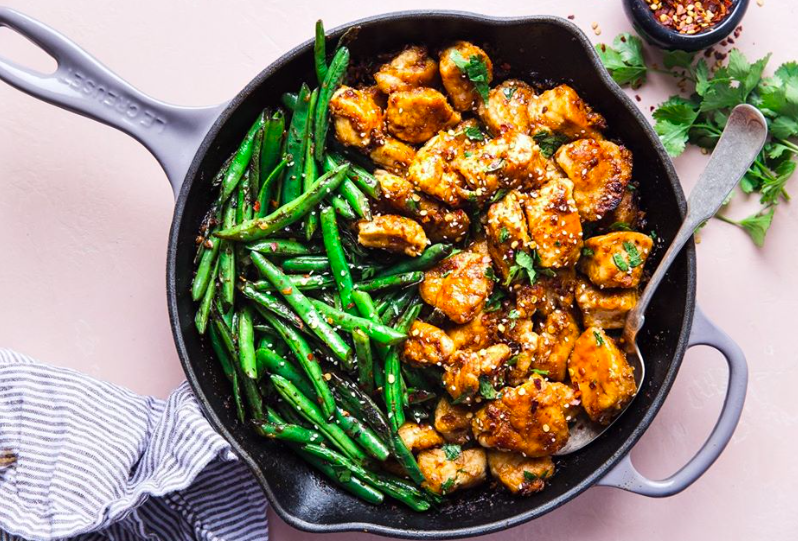
Here’s a photo that’s more typical of what I’m shooting now:
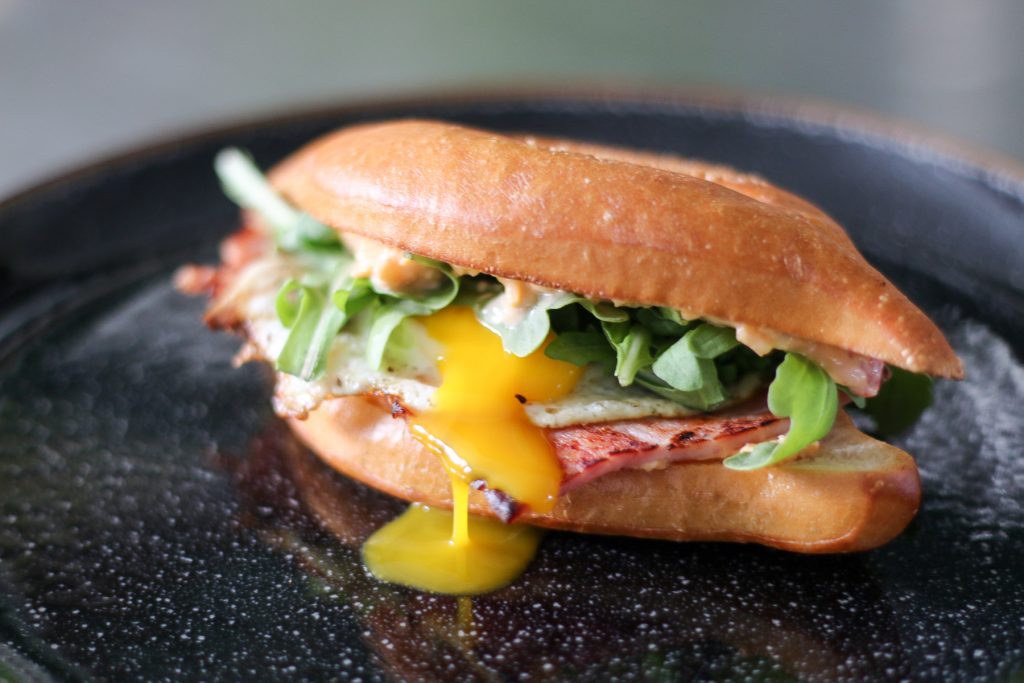
Look, I know it’s not going to win any awards, and I’m comfortable with that. I’ll never be the world’s best food photographer, and goodness knows there are bloggers out there that make even my best work look positively amateurish.
Take Better Restaurant Food Photos… Right Now!
My point is that through practice, and the application of a few easy techniques, everyone can improve their food photos to make them more appealing and appetizing. Below are seven simple steps for better restaurant food photography:
Stop using your flash.
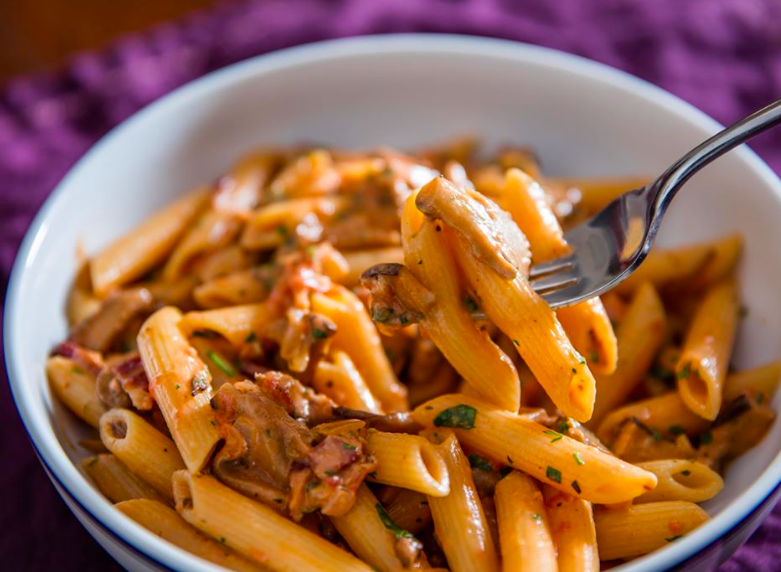
For budding photographers, the on-board flash is the enemy of good food photography. The first, easiest-to-remember rule of food photography is this: Use natural light, because the flash that’s built into your camera, unfortunately, is pretty crappy. Well, I shouldn’t say that. It’s great at producing a very brief, very bright flash of very directional light. Unfortunately, this kind of light doesn’t make food look very good. Let’s look at a quick comparison:
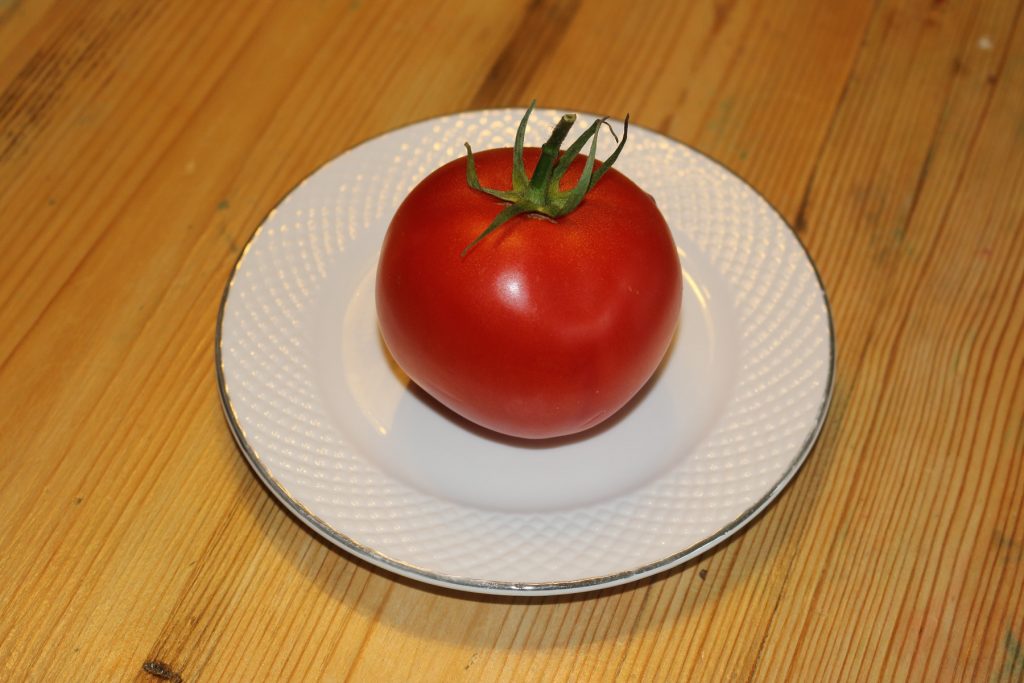
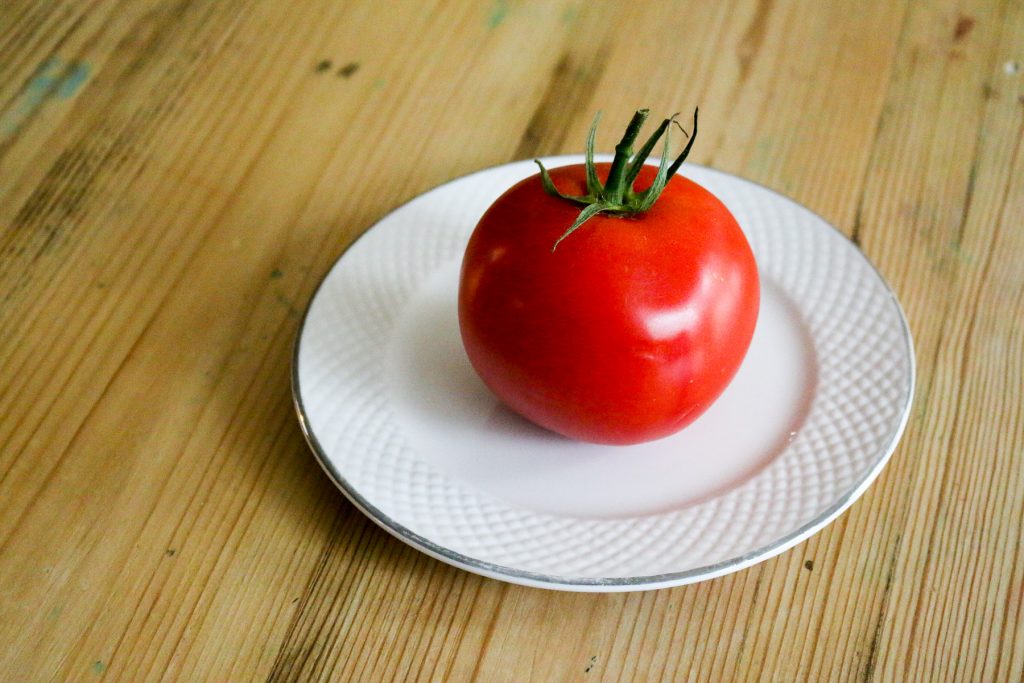
In the photo on the top, the camera’s automatic settings (including flash) were used. Notice the dark, harsh shadow underneath the tomato. You can also see the reflected flash of the camera, which shows as a harsh glare. It makes the entire photo seem flat, two-dimensional, washed-out, and unappetizing. The photo on the bottom uses the same camera, and the same lens; the only thing that’s different is that the overhead lights have been turned off, the flash has been turned off, and the only light in the room is coming through a picture window on a rainy day. Notice how much softer the shadow underneath the tomato is, as well as the reduction in glare.
The quality of your light is the single biggest factor in how your food photos turn out, and it is a theme we will be returning to again and again. Avoid shooting outdoors in direct sunlight, as this can cause the same harsh shadows that a flash can. In general, we’ve found it best to shoot during daylight hours, near a window, with the overhead lights in the kitchen turned off, preferably with a gauzy curtain to help filter the light and reduce harsh shadows. You will immediately improve your food photos, without spending a dime, with this single, most important tip: Shoot in natural light, with the overhead light off, on an overcast day. The curtain and the clouds will help create perfect filtered light.
Get close up and consider your angles.
While it’s not the right choice for all dishes, sometimes, you’ve just gotta get close up. Try to create interesting angles, either by getting very close to your subject, in a three-quarter angle, or by shooting from the absolute top-down. Avoid shooting food from angles in which you “normally” see it. A picture of an Oreo cookie bitten in half is going to be much more interesting shot close up, with the bite filling the frame and showing texture, than alone and bereft on a plate, top-down. Why? Because your brain has already seen an Oreo from that angle 100 times.
That said, this can be a little tricky to manage, and something that you can only learn through practice. Sometimes, otherwise well-composed plates just don’t look right in photographs, because of the angle from which they were shot.
Related Reading: 7-Reasons to Consider Adding Small-Batch Retail to Your Restaurant
As a viewer, our brains need to be able to quickly process what we’re seeing. Weird angles and extreme close-ups can be confusing, which is why top-down shots have become so popular. Experiment, and when in doubt, shoot from three-quarters (the position you would be in if you were seated at a table, and a plate of food was placed in front of you), or top-down for a more artful approach.
Stop jiggling, even if you think you’re not jiggling.
When shooting food, particularly close-up, any movement of the camera (even your finger squeezing the shutter release) is going to result in a slight loss of “crispness” in the finished photo. Always try and brace your hand against something, and if possible, shoot using a tripod, using either a remote shutter release or, in a pinch, using the camera’s timer function. Set up your shot with the timer, push the shutter release button, and walk away. In a few seconds, your camera will fire, resulting in the crispest possible shot.
Consider your light bulbs.
I know, I know: What a thrilling topic. But if your food photos consistently look washed out or just kind of “off,” it’s time to consider your light bulbs. If you must shoot at night or using artificial lights, the source of that light will have a lot to do with how your finished photo looks.
That light that’s pouring out of your ceiling fixture, or the light in the vent hood over the stovetop? It’s not going to do your photography any favors. General lighting creates harsh shadows, and even worse, can create strange colors in your finished photographs.
Fluorescent light, for example, can give your finished photos a strange blueish hue, and there aren’t many foods that look appealing in blue. Replace your overhead light bulbs with full-spectrum or “daylight” bulbs, available at any home improvement or big box retailer.
Create your own “natural” light with a quick-and-dirty can light.
If you find yourself shooting food primarily at night, or in the closed confines of your commercial kitchen, shooting under artificial lights is probably a necessity. But you can still control the source and the quality of that light, with one of our inexpensive homemade clamp lights. Best of all, they’re so cheap, rugged, and disposable, that you don’t have to worry about dropping them or getting fryer oil on them.
Purchase an inexpensive aluminum painter’s clamp light and a high-wattage full-spectrum bulb from a home improvement store. Cut a circle out of an old white dishtowel or bedsheet, and stretch over the front of the light, affixing with tape or a rubber band.
Presto! For around ten bucks, you’ve got yourself some on-demand, full-spectrum, directional filtered light. Experiment with shining your light directly on your plate (watching for those harsh shadows), or, for best results, aim the light up to the ceiling, and allow the light to bounce back onto your dish.
Plan the shot, before you pick up the camera.
For me, the biggest question I ask about a plate of food before I even start shooting is: “Which aspect of this dish am I most trying to emphasize?” For example, if you’re shooting a plate of nachos, you probably want to place the emphasis of the photo on a perfect rivulet of melting cheese, rather than on the corner of a burned tortilla chip.
If you’re shooting a ten-layer lasagna, you’ll probably want to emphasize the height of the dish, which means you should shoot it from the side, instead of from the top-down. With each dish, figure out which quality of the food you want to highlight, and it will help you decide which angles you should be shooting from, and where to place your focus.
Use a reflector board to cancel out those harsh shadows.
If hard-edged shadows are spoiling your shots when using artificial light, try using a reflector to soften some of those dark spots. For around $25 bucks, you can purchase a full-spectrum light with a stand and umbrella filter (or use our DIY light outlined above. Use the light to shine diffused light onto your plate, and then reflect some of that light back toward the source using an inexpensive piece of white foam board, like so:
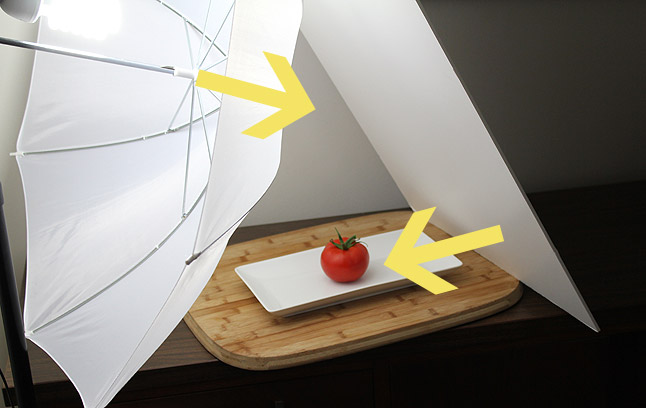
In the above setup, two things are happening: Light passes through the umbrella, filtering softly onto the subject. Then, the foamboard bounces that same light back in the other direction, softening further the already diffused shadow that is created on the tomato.
This creates a soft light, which appears to come from one direction, while casting a soft shadow, and is a great way to create a “natural” looking photograph. You could also replace the foamboard with another filtered directional light coming from the opposite direction, which would minimize shadow, and create a very clean, sterilized look.
As a general rule of thumb, remember that for every light source you create, you must fill it using either another light source, or a reflector.
Use photo editing apps and filters sparingly and wisely.
We’ve all been there: You’ve only had a chance to snag one photo, and it’s not your best. The light is all wrong, the angles are weird, and the subject is barely in focus. It can be tempting in times like this to turn to heavy digital editing to try to salvage the shot, either through Instagram filters, artificial sharpening, or color correction.
Here’s the thing: Most of the time, applying a heavy filter to a photo will make it look worse, not better. Those filters were novel when they were first introduced, but there’s a reason nobody shoots food through a 1970s-era Polaroid anymore; the washed-out colors and weird lens effects tend to make food look worse, not better.
When I need to salvage a photo on my mobile device, the first app I turn to is Adobe’s Lightroom app, for basic color correction and exposure changes. If you must use an Instagram filter on your shot, turn down the strength of the filter to make the effect more subtle.
I also like the “Foodie” app for making subtle changes to a photo; their simplest filters tend to slightly increase exposure and saturation, which makes almost all food photos “pop” a little more.
When you’re ready, purchase a DSLR camera.
Real photographers are going to hate this, because they’re already fighting against the common public perception that cameras (not people) are responsible for taking a truly great photo.
And while this perception is 100% untrue, the fact remains: You’ll get better results, even if you’re just starting out with food photography, out of a higher-end camera with the flash turned off, than you will out of a cell phone camera.
Yes, it’s true that you can get great photos that rival high-end DSLRs out of a cell phone. And yes, it’s true that all of the fancy equipment in the world won’t save a bad photographer from themselves.
But will your photos look better from day one, shooting on higher-end hardware? Yes. Will they get even better as you learn and grow as a photographer? Also yes.
It’s a weird sign of the times that restaurant owners not only need to cook, but be able to take a decent photo too. These basic food photography concepts outlined in this post are a good place to start.
After all, if your Instagram followers aren’t champing at the bit to get through the door to taste your latest creation, what are you even doing?
Own a restaurant? Learn the 6 profitability secrets Chinese restaurants don’t want you to know.
